How to wear a battle belt?
Learn how to wear a battle belt for comfort and quick gear access. Get expert setup tips, fit hacks, and upgrades to boost your tactical performance.
9/1/20255 min read
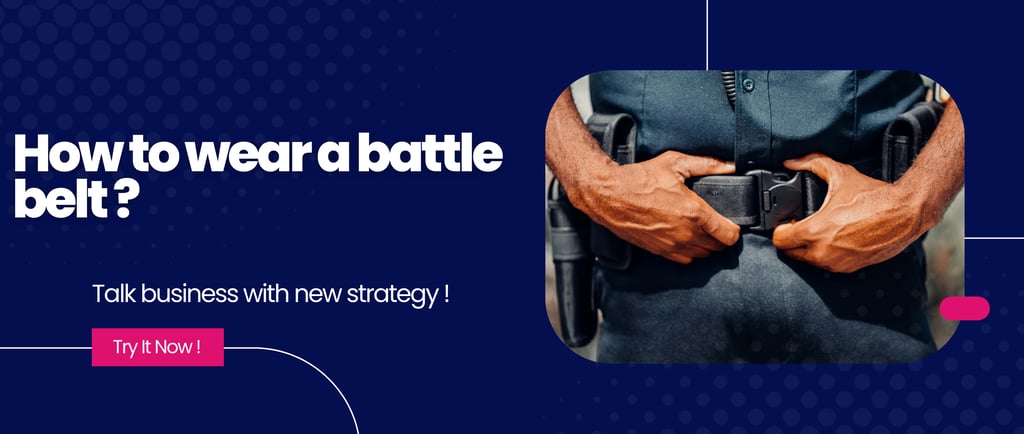
A battle belt is a rugged gear belt designed not just to secure your pants, but to carry essential tools—firearms, magazines, med kit, flashlight—right on your hips. It’s more structured than a standard duty belt, often using an inner-outer belt system: an inner strap loops through your pants, while a wider outer belt attaches with Velcro and supports MOLLE pouches for modular gear. This setup keeps your load secure and steady, even when you bend or run. I’ve tested it myself during range days. The difference between a basic belt and a battle belt is clear: this belt handles weight smartly and puts key gear within instinctive reach. That’s how to wear a battle belt with both comfort and function.
How to Wear a Battle Belt: Setup Guide & Gear Placement Tip
What Is a Battle Belt?
A battle belt is a reinforced belt system built to hold tactical gear securely on your waist. Unlike a standard duty belt, it’s designed to manage heavier loads without shifting. Most setups use an inner-outer belt system: the inner belt threads through your pants, while the outer belt attaches via Velcro, creating a solid base for MOLLE or laser-cut pouches. This structure gives shooters, security teams, and outdoor enthusiasts fast access to gear.
I’ve used one during range practice and long hikes, and the difference in comfort is striking. Properly worn, a battle belt keeps essentials close, distributes weight evenly, and avoids shoulder fatigue from overpacked chest rigs. That’s the foundation for how to wear a battle belt with confidence.
Why Use a Battle Belt vs a Regular Belt
A battle belt outperforms a simple belt in nearly every tactical scenario. It stabilizes firearms and gear while keeping your torso clear for mobility. Unlike duty belts, which can sag under load, a battle belt is wider and stiffer, preventing bounce during movement.
It’s popular among military, law enforcement, and civilian shooters for its ability to spread weight across the hips, reducing strain. Even during long hours outdoors, you’ll notice how much easier it is to move, crouch, or climb. For those serious about preparedness, understanding how to wear a battle belt is the first step toward building a practical loadout.
Choosing the Right Battle Belt
Before learning how to wear a battle belt, choosing the right system is essential. Start by selecting the belt style:
Single Belt: Best for minimalist setups or concealed carry.
Padded Belt: Offers more comfort and space for gear, good for extended wear.
Two-Piece Belt: The most secure option, combining an inner belt and outer belt.
A solid buckle, high-strength nylon, and MOLLE compatibility are non-negotiable. I favor a two-piece belt with a rigid frame. It locks gear in place and prevents movement during dynamic drills.
Sizing matters too. Measure your waist accurately, accounting for clothing layers. A loose belt shifts, while one that’s too tight restricts breathing.
A good fit helps you train confidently and focus on performance, not discomfort. Investing time in finding the right battle belt saves frustration later, especially when you’re refining placement and mastering your draw.
How to Wear a Battle Belt (Inner & Outer Setup)
Here’s a step-by-step guide on how to wear a battle belt:
Start with the Inner Belt: Thread it through your pants like a regular belt. It should sit snugly around your waist without pinching.
Attach the Outer Belt: The outer belt, often lined with Velcro, fastens over the inner belt. Adjust it until it feels secure but comfortable.
Check Position: The buckle should sit at the center front, around the 12 o’clock position. Keep space clear around your hips for holsters and pouches.
Balance the Load: Distribute weight evenly. Heavy items like a firearm or radio should be opposite each other for balance.
Test Movement: Squat, kneel, and jog. The belt should stay in place with minimal shifting.
I’ve worn belts that slipped mid-run—nothing kills confidence faster. A well-fitted battle belt eliminates that distraction. Practice adjusting it until your setup feels natural. This step is crucial before adding gear.
Best Gear Placement on Your Battle Belt
Knowing how to wear a battle belt is only part of the equation—gear placement determines performance. Use these guidelines:
12 o’clock: Keep the buckle clear.
2–3 o’clock: Holster your sidearm for a natural draw.
4–5 o’clock: Place spare magazines.
6 o’clock: Leave this area open to prevent discomfort when sitting or lying prone.
7–9 o’clock: Add IFAK (Individual First Aid Kit) and a dump pouch.
10–11 o’clock: Flashlights, multitools, or utility gear.
Weight distribution is key. Keep heavy gear near the sides and lighter tools toward the back. Use MOLLE or laser-cut webbing for a modular, custom fit.
I’ve experimented with setups that overloaded the back; it slowed me down every time. Aim for balance, not excess. Start minimal, then add gear as needed. Adjust placement until you can grab every item instinctively without looking.
A well-organized belt keeps movement smooth and reaction times sharp. Spend time practicing reloads, medical drills, and transitions until your gear feels like an extension of your body.
Essential Items to Carry on a Battle Belt
A solid belt doesn’t need to carry your entire kit. Focus on essentials that you need immediate access to:
Firearm + Holster: A sturdy holster with proper retention is critical.
Magazines: Two or three extra magazines strike a good balance.
IFAK: Always carry trauma supplies like a tourniquet and pressure bandage.
Flashlight: Compact and reliable, useful for low-light scenarios.
Multitool or Knife: Versatile and lightweight.
Dump Pouch: For storing spent magazines or miscellaneous gear.
Some users add radios, handcuffs, or small hydration systems, but keep it lean at first. Your battle belt isn’t meant to replace a plate carrier or pack—it’s for immediate needs.
In testing, I’ve found that too much gear slows reload times and adds unnecessary bulk. Build a loadout that supports your role, whether it’s security, training, or outdoor preparedness. With time, your belt will evolve into a lightweight, efficient setup that matches your style and skill level.
Common Mistakes to Avoid
Overloading is the number one mistake. A bulky belt makes movement clumsy and draws attention to every step. Another common error is poor sizing—belts that ride too high or sag break your focus.
Neglecting training with your gear is also a problem. Practice drawing, kneeling, and transitioning positions while wearing your belt.
Finally, avoid cheap materials. I’ve seen belts fail under stress, dumping gear mid-course. Invest in durability and fit.
Knowing how to wear a battle belt is worthless if your equipment doesn’t stay secure. Keep your setup simple, balanced, and field-tested.
FAQ: Quick Answers on Wearing a Battle Belt
Q: What is the best way to wear a battle belt?
Wear an inner belt through your pants, then attach the outer belt snugly. Keep the buckle centered and distribute gear for balance.
Q: Should I use an inner-outer belt system?
Yes. It’s the most stable setup and keeps the belt from shifting during movement.
Q: How tight should my battle belt fit?
Tight enough to stay put but loose enough for comfort. You should be able to squat and run without restriction.
Q: Can I wear a battle belt over clothes?
Absolutely. Most are designed to be worn over pants, and some even fit over outerwear.
Q: What gear is essential on a battle belt?
Start with a holster, spare magazines, and an IFAK. Add pouches and tools as needed.